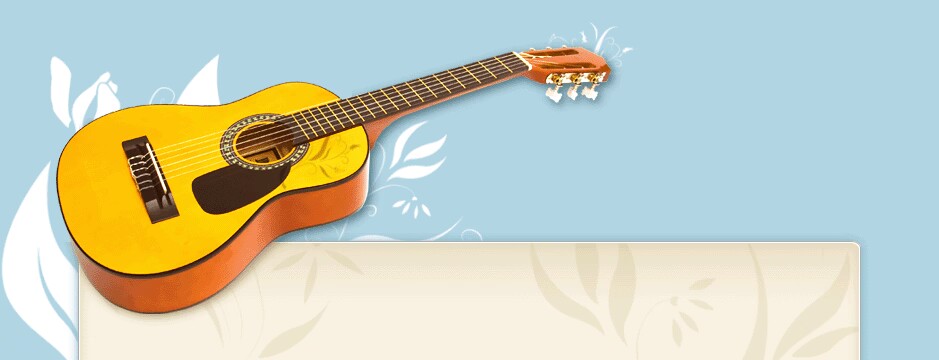
Learn to Play the Guitar
learning the guitar has never been so easy!
WARNING: Read this before you move on..
In our effort to deliver better content to our viewers, we are giving away the ultimate “Learn to Play Guitar” guide, which consists of 27 in-depth guitar-playing lessons, and many more golden tips – for free! Enter your Name & Email below and we’ll send you the eBook instantly. This is a limited-time offer, and will be called of once 50 users download this eBook. Are you in.. or out? We’ll find out soon enough..
Your privacy is important to us. We will never sell, rent, share or spam your email address.
Lesson 1: How to be able to play the Guitar overnight
Introduction:
Before starting, you have to remove all thoughts in your mind that tell you that playing a guitar is difficult. Be positive – think that you can do it. Many people think playing the guitar is the work of a genius – but it isn’t. Its actually very easy once you get the drift. Now wait, to master it might be the work of a genius, but to play songs on the guitar is easy – and these lessons are going to help you for that very purpose. I’ve been playing & teaching the guitar for many years and I’ve been practicing since I was a child. I’ve taught many of my friends & family members also, and most of them were able to play a song or two practically overnight. You have to be dedicated & passionate, and learning it will be as easy as A-B-C. I’m not joking. This first lesson will give you an absolute kick start – are you ready to rock & roll? Good! Lets start..
And so.. we start..
Go get your guitar! Before going on, I’m assuming that you know how to hold a guitar and pluck the strings either with your fingers or with a guitar ‘pick’. If not, don’t worry. I’ll teach you..
PS: If you’re left-handed, DO EVERYTHING OPPOSITE. i.e. ‘left upper thigh’ etc.

Please remember: Playing the guitar for continuous hours will strain your back.
Solution: Maintain an upright posture. Now, pick up the guitar and place the back of it against your stomach. If you are right handed, the guitar neck should be pointing towards your left. Rest the guitar body on your right upper thigh (Opposite for left-handers).
Now place your left hand around the guitar neck and place your right arm around the body so that your hand is lying by the strings. Adjust your body positioning so that you are completely comfortable. Ready for the next stage? Cool!
Hand Positioning
If you’re a leftie, don’t worry. You have three options here. The first option is to buy a right-handed guitar and re-string it, so that the order of the strings in the above image is reversed. The second option you have is to buy a left-handed guitar. The third and final option is to learn right-handed – I’ve seen many of my friends doing this. And its not as difficult as you think! ![]()
If you’re right handed, you will use your left hand to construct chords. The left hand fingers are bent and pressing down on the strings on the fret board. The back of the neck is curved, so that your hand molds into the shape of the neck. Your thumb is arching aver the top of the neck. This is a common thumb position for constructing chords. It is also OK to press your thumb into the back of the guitar neck when constructing chords, although this is more common when playing scales. Try out both thumb positions and use the one that is most comfortable for you.
Right Hand/Arm
This is the hand that you will use to “strum” the strings to make the different chord sounds. Rest/Lie your right arm over the guitar. Your right bicept should be resting on the top of the body of the guitar. Your hand should be positioned directly above the sound hole in the guitar. This is where the sound is produced.
Using a Pick
You should grasp the pick between your thumb and forefinger of your right hand. In this section we’ll cover Guitar Tablature or “TAB” for short. This system allows you to get propelled into playing songs and ‘riffs’ on the guitar almost immediately! Guitar Tab is a universal language among musicians and even professionals use it as a reference. After this lesson, you will be able to Google the Guitar Tab for pretty much any song that you want and be playing the melody line or main riff within minutes!
What is Guitar Tab?
It is an alternative way of reading music. Instead of reading notes on staff paper which can be quite tricky, it is made up of a number system that is so easy my grandma can play ‘smoke on the water’ with ease!! NO joke. The following 6 lines do not represent your typical ‘music staff’ which actually has 5 lines. These 6 lines represent the 6 strings on your guitar. The Top Line represents the thinnest or ‘highest pitched’ string on your guitar. The string that is closest to the floor. The bottom Line represents the LOWEST SOUNDING String on the guitar and this one is the thickest. It also is the closest to the ceiling.
String #
____________________________________________________ 1 ____________________________________________________ 2 T____________________________________________________ 3 A____________________________________________________ 4 B____________________________________________________ 5 ____________________________________________________ 6
Now..
This is what blank Guitar Tab looks like. Right now all you see are the 6 lines (6 Strings) I know you’re thinking “why is it upside down?” I have no idea. That’s how Tablature was invented. Just imagine the bottom line as being the top string that’s closest to you. With that out of the way we can work on our next keyword. “Frets.”
I am sure you have heard this term before ‘Guitar Frets.’ If not, they are the metal strips that go up and down across the fingerboard of the guitar. They separate the notes (tones) on the guitar. When you place your finger (form your left hand) in between two frets and hold down the string you are then prepared to strum or pick the string with your right hand. Strings aren’t meant to only be played open. When you hold down a string at a given ‘fret’ what you are actually doing is making the string shorter, thus making the pitch ‘Higher’ and changing the note (or tone). There are usually about 20 something frets on a standard guitar. It doesn’t make a big difference if you have 20, 22, or 24 frets on your guitar. This just means that you can play a couple notes higher on the guitar and those notes are so high pitched they are pretty annoying to listen to anyway! You will stay in the lower range of the guitar most of the time. Now let’s get this ‘Higher’ and ‘Lower’ thing straight. In music, the musical notes (tones, pitches, whatever you call them) are changed by pitch. We all know that pitch means the frequency of sound so something high pitchedwould be like an opera singing lady who breaks a wine glass with a super high note.
A Low pitch is similar to a Bass instrument or a man with a really deep voice. ‘Deep’ is the same as ‘Low’ when talking about pitch. On a slide whistle you blow into it and move the slide up and down to change the pitch. The closer you bring the slide to you the higher the pitch gets and vise versa. On the guitar however it is not up and down. It is left to right. When you play a string open, that is the lowest (deepest) sound you will hear produced from that string. As soon as you place your finger on the First ‘Fret’ and then strike the same string again the pitch will be slightly higher. The more you move to the right the higher the pitch will get. (Because the string is getting shorter!). There are usually dots on the fingerboard of your guitar to act as a guide when moving around and holding down different frets. Normally they are on the 3rd, 5th, 7th, 9th and 12th frets.
*TIP*: You don’t want to put your finger on the metal fret itself…but just slightly to the right of it produces the best sound.
Let’s Play Already..!
Ok, cool! Now that we know what frets are, we know how to play a note (playing either an open string, or pressing down a fret on that string and then strumming it) And we know what ‘Blank’ TAB music looks like. Let’s learn how to read TAB and how it will help you. The lines represent the strings. The NUMBERS represent the Frets.
____________________________________________________ ____________________________________________________ ____________________________________________________ ____________________________________________________ ____________________________________________________ _0_3_5_0_3_6_5_____________________________________
Music (and TAB) is read from left to right like English. The ‘TAB’ above tells you to play on the Low string only (the thickest string) You know this because the numbers are only written on that string (the bottom line) The number ‘0’ means to play the string open. Then the number ‘3’ means place your index finger of your left hand and hold down the 3rd fret on the low string (same string you played open). and then followed by the 5th fret and so on.
This is the main riff to the popular song ‘Smoke on the Water.’ If you are unfamiliar with this song you can see it and view at on Youtube. Type in ‘Smoke on the Water.’ this way you will know what it sounds like before you attempt to play it by reading it above. So if you play the string open (just strum the string without touching it with your left hand) and then the 3rd fret and then the 5th and then open again, and then the 3rd fret 6th fret and 5th fret…you have you have just played smoke on the water! Try this next song…EVERYBODY Knows the tune from ‘Mary Had a Little Lamb’ so you shouldn’t have any trouble with it. ‘Mary Had a Little Lamb’
____________________________________________________ high string ____________________________________________________ ____________________________________________________ ____________________________________________________ _____________________________2_2____________________ _4_2_0_2__4_4_4__2_2_2__4__________________________ LOW String
The first 4 notes (4,2,0,2) sound like “ma-ry had a” and then the three 4’s (444) sounds like “lit-tle lamb” and then again with three 2’s (222) is again “lit-tle lamb” and then the 4 on the low string and the two 2’s on the next string sound like the final “lit-tle lamb” Notice how the last two notes are on the next string. This would be the second string from the closest string to you. It is also the second most thick string on the guitar. REMEMBER: With guitar TAB you must already be familiar with the melody and rhythm of the song because even though the TAB shows you which notes to play to make the song, it does not show you how ‘long’ to hold each note in order to make the song sound right.
For example, reading the above song ‘Mary Had a Little Lamb’ by just playing all the notes in a row without giving the proper time for each note would not sound very much like that song at all! You know to put a pause in between ‘little lamb’ and the next ‘little lamb’. Also, you know that the last ‘lamb’ is held for a slightly longer amount of time than the rest. Here is a scale study for the guitar. This will sound like (Do-Re-Mi-Fa-Sol-La-Ti-Do) It is know as the ‘Major Scale’ and plays a HUGE part in music in general. It is also a great finger strengthening exercise for the guitar player. This requires you to play on three strings. Frets # 3 and 5 on the LOW string. Followed by Frets # 2, 3 and 5 on the very next string. Lastly, frets # 2, 4, 5 on the 3rd string. Executed correctly it should sound like Do-Re-Mi-Fa-Sol-La-Ti-Do.
____________________________________________________ high string ____________________________________________________ ____________________________________________________ _____________2_4_5__________________________________ ______2_3_5_________________________________________ _3_5________________________________________________ LOW String
As stated in the beginning of this report, it is not intended for you to become a master overnight. But, with this information and the fabulous world of the internet and countless resources available you can take this as far as you want.
Many famous musicians to this day do not know how to read music and 99% of them know TAB and can learn a song or solo quickly by reading the TAB. There are SO many FREE websites that have the TAB to almost every song! Go to google and type in Guitar Tab for (song you want to learn) and it will surely pop right up. Remember that the bottom line is the string closest to you…DON’T let that fool you.
The TOP Line is the guitar string closest to the floor. We didn’t even play on that string this lesson.
CONGRATULATIONS! You now know how to hold the guitar You now know how to play the very popular riff for ‘Smoke on the Water’ You know how to play a ‘major scale’ which is the foundation for modern music. You know how to read Guitar TAB! You know how to play ‘Mary Had a Little Lamb’
You can now go look up the TAB for any song you want to learn for FREE online!
.JPG)
Click here to view the enlarge version of the guitar anatomy picture.
That will be it all for the first lesson folks. Be sure to watch out for Lesson 2. We get into chords there!
Till then, happy playing – Enjoy!
The LearnPlayGuitar.org Team!
Posted in Guitar Lessons | 1 Comment »
One Response
- Learn to Play the Guitar » Blog Archive » Guitar Lesson 2 » LearnPlayGuitar.org Says:
May 9th, 2008 at 9:06 pm[…] Been through Lesson 1? If not, click here. […]
Categories
General Information
Guitar Lessons
Recent Posts
Lesson 1: How to be able to play the Guitar overnight
Lesson 2: How to be able to play the Guitar overnight
How to Learn to Play the Guitar
Learn to Play Guitar Fast
History of the Guitar
Pages: 1 2 3 4 5 6 7 Next
Blogroll
Free Sheet Music
Can’t find what you’re looking for? Use Google Search!
Meta
Log in
Entries RSS
Comments RSS
WordPress.org